

Looking to send Handwritten notes from Salesforce? Below is a full walk-through of the software. Looking for the TLDR? Below the video is a step by step guide to get you started quickly.
Using Handwrytten’s plugin for Salesforce, we can automate the sending sending of one-off notes, bulk notes, and even notes sent from ProcessBuilder or Flows.
Handwritten has been available in the Salesforce App Exchange since 2017 and has recently undergone a significant overhaul. This revamped version is undeniably better offering efficient functions and a user-friendly interface. However, remember to give it a star rating after trying it out!
To begin installation, go to the App Exchange and search for Handwrytten. Once you choose the plugin, you’ll be asked to agree that the app will be using the Handwritten API, which you should allow. It’s best to install it into the Production environment, for all users. You can later adjust this for individual users directly from the platform.
Once successfully installed, navigate to Setup in Salesforce and follow this step-by-step guide.
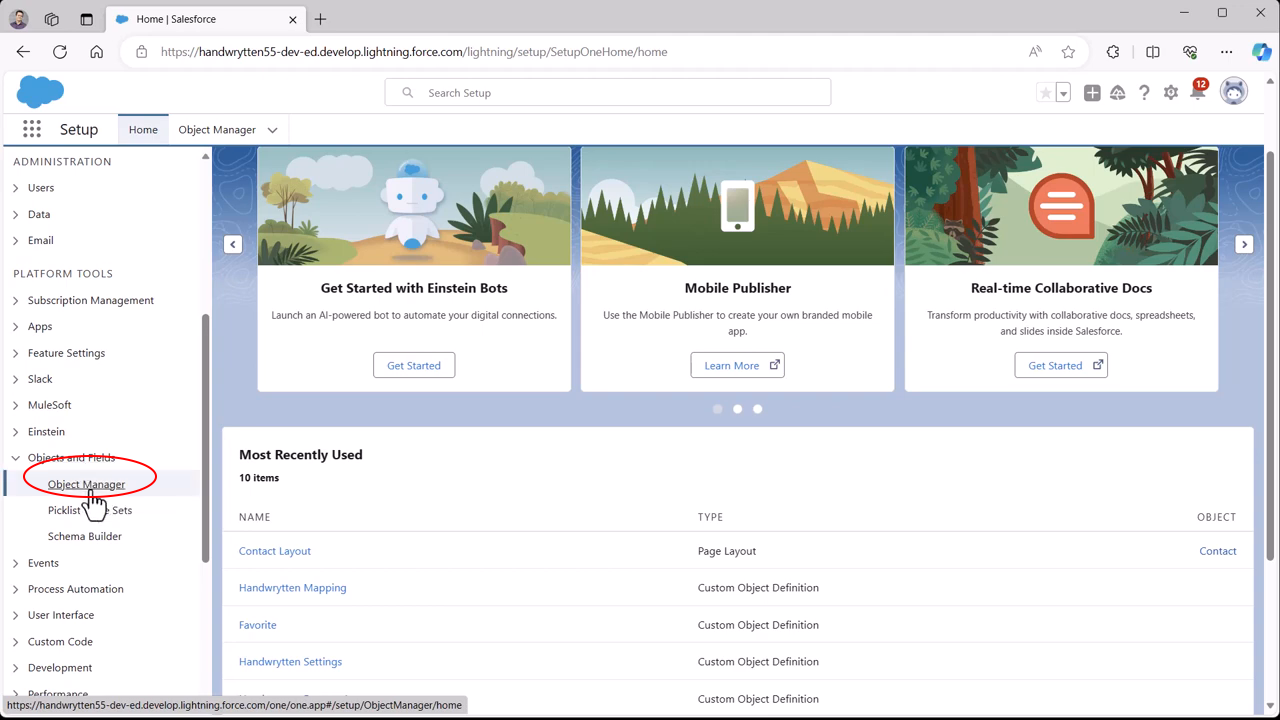
Firstly, click the Setup gear in the upper right. Find Objects and Fields and choose the first option, Object Manager. You can install the Handwrytten app into several common objects – the Account object, the Contact object, and the Opportunity object. It is typically recommended to at least use the Contact object or both the Contact and Account objects, as these are commonly used to send handwritten notes.
For the purpose of this guide, we’re doing the installation process strictly for Contacts. The process is the same for Accounts and Opportunities.
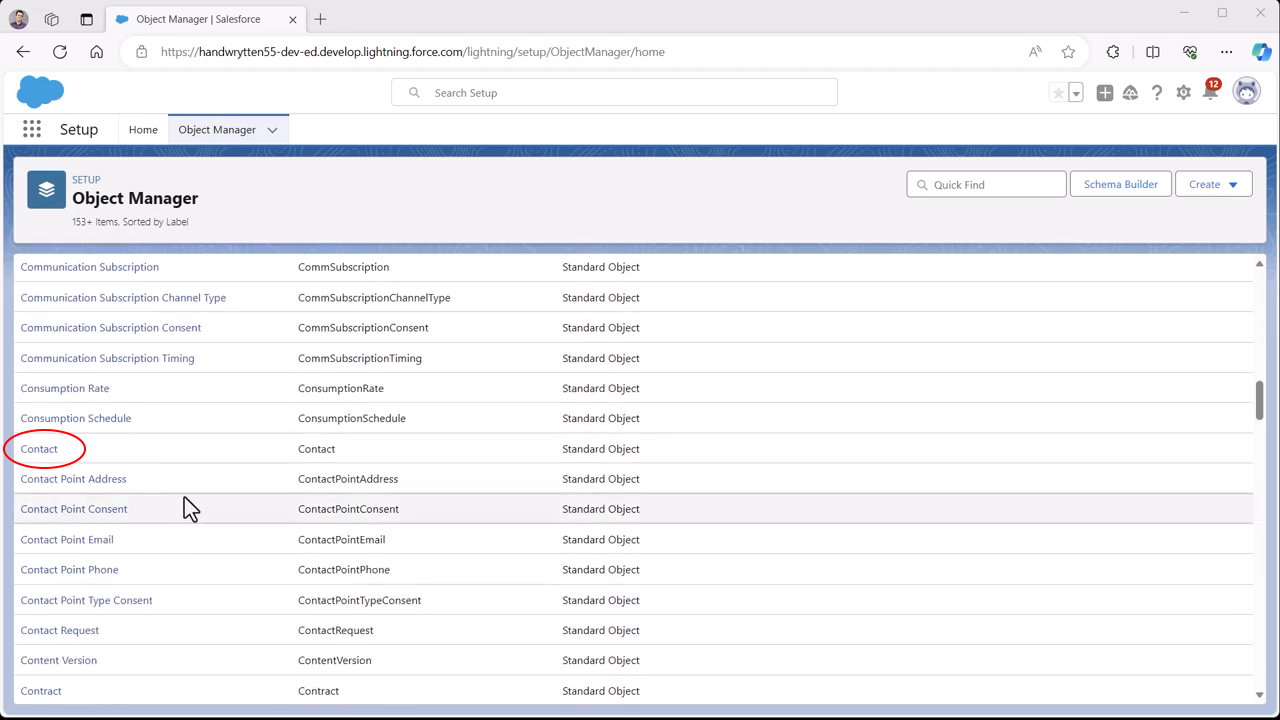
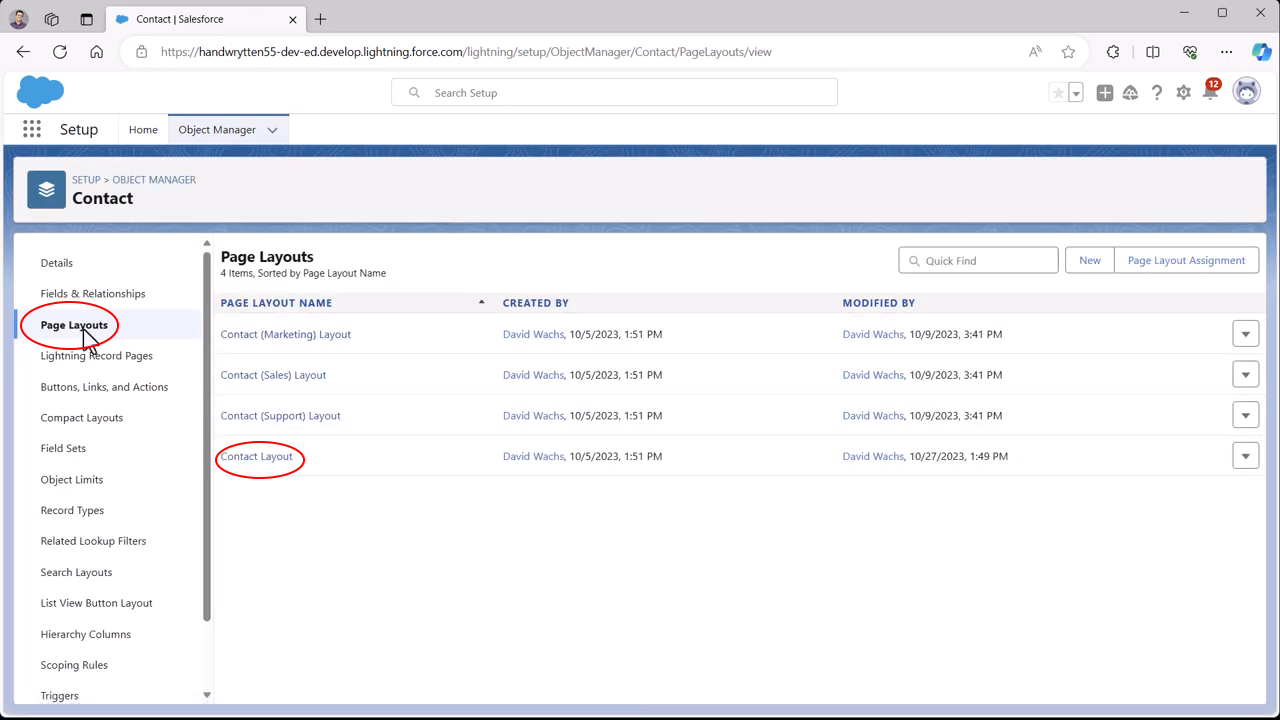
Now, click on Contacts -> Choose Page Layouts -> Select Contact Layout.
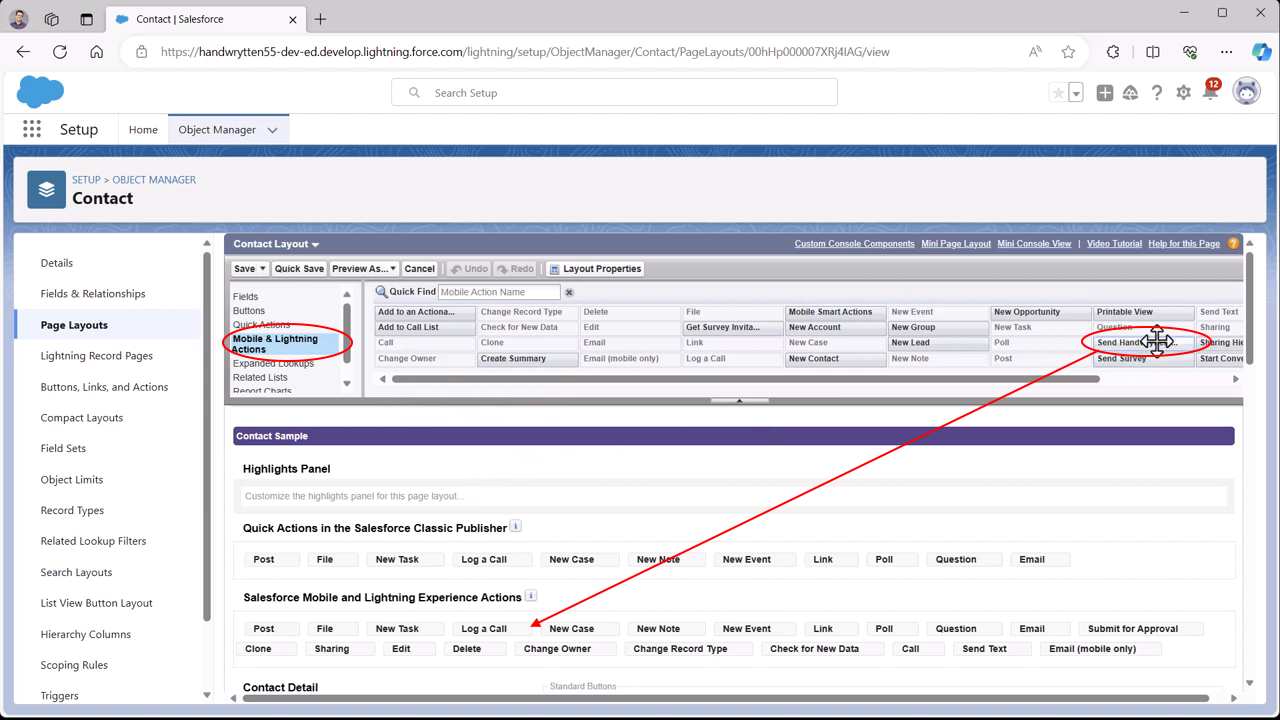
To send a Handwritten Note, it is required to add a mobile action and a lightning action for the button. Choose Lightning Actions -> Send Handwrytten Note -> Drag it to the second bar behind an option like ‘log a call’.
Additionally, you can add a related list showing all handwritten notes sent to this contact. This is optional – you don’t necessarily have to display this list if you don’t want to. To do this, click Related Lists and drag the Handwrytten Notes list to the related lists area.
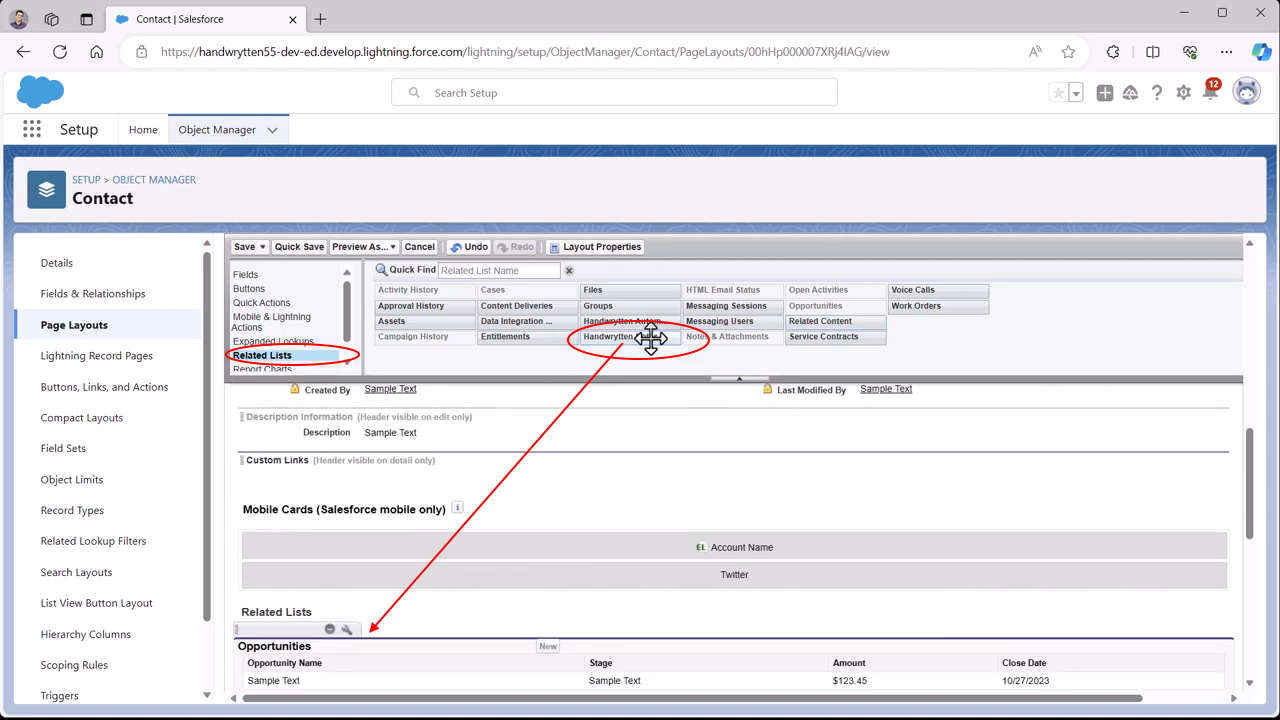
Once you finish setting up the page, click Save at the top of the page.
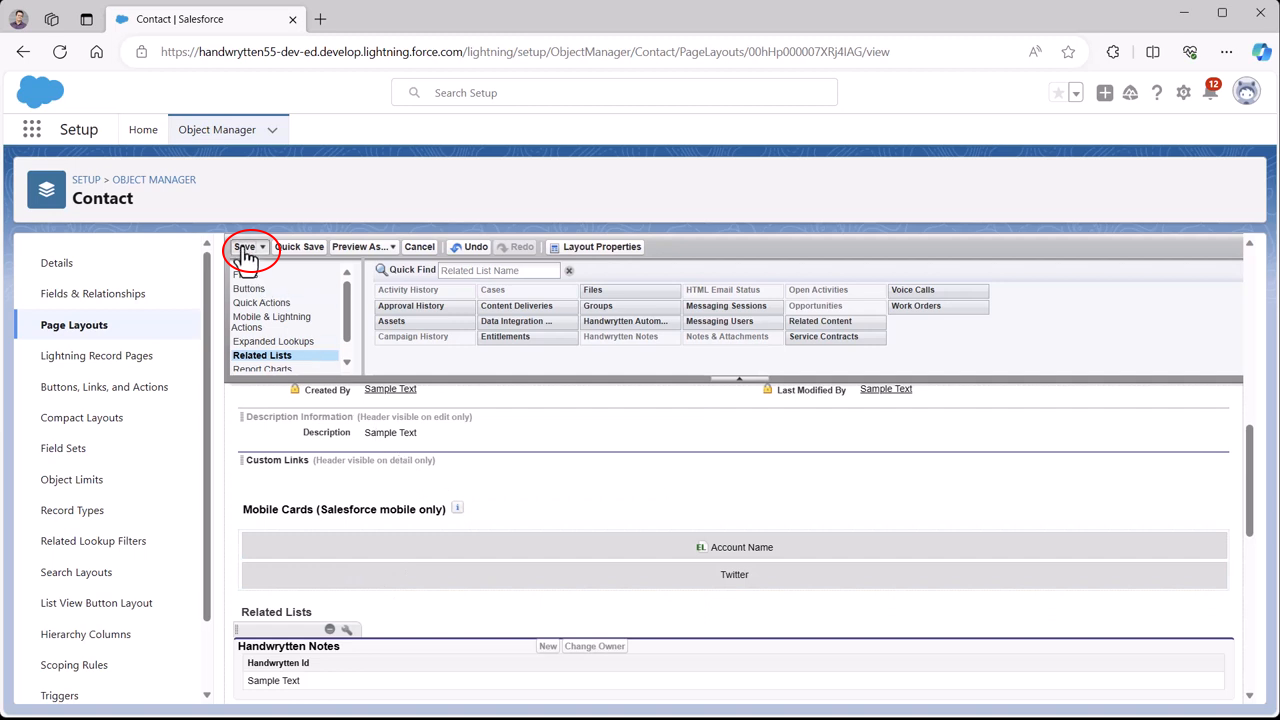
You have now successfully completed part one of the setup. The next part involves adding the button to two locations for sending Handwritten notes in bulk – Search Layouts and List View.
To add the “Send Bulk Handwrytten Notes” to the appropriate screens, you need to add the button to the “Search Layout” and “List View” layout. Luckily, it’s pretty easy.
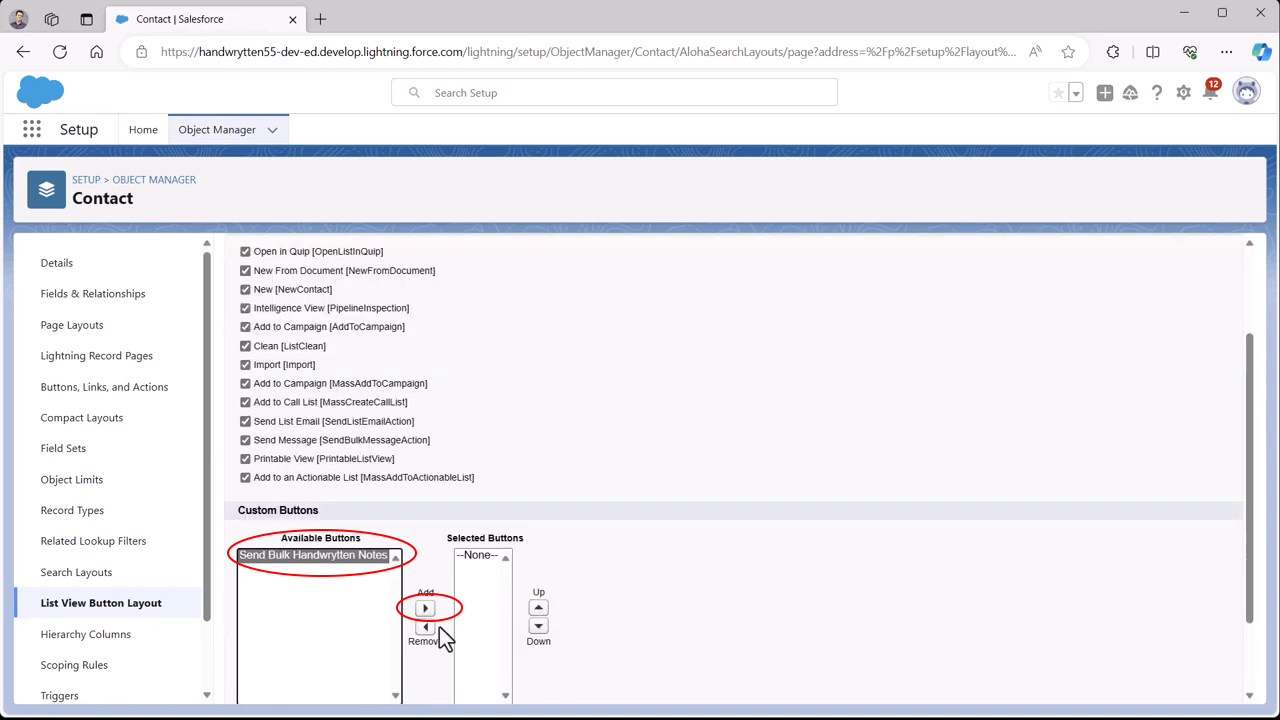
Repeat this process with the List View button. This completes your bulk sending steps.
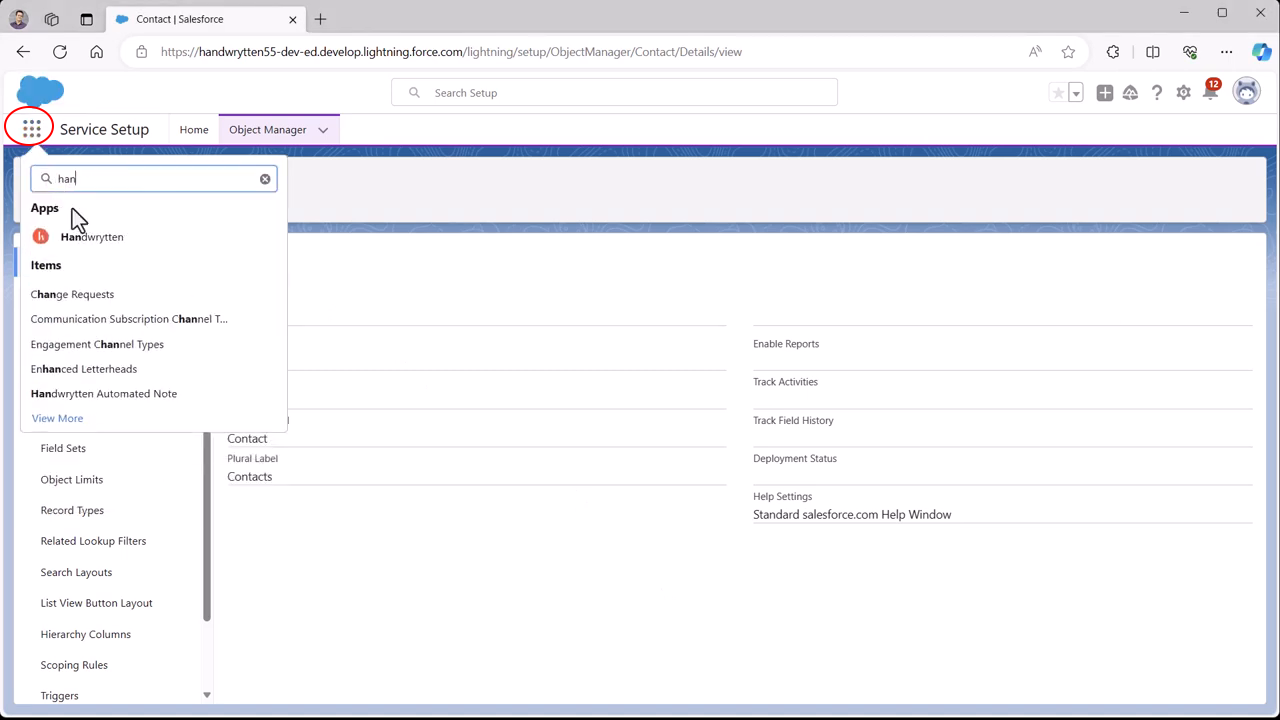
Now, it’s time to connect your Handwritten account. Navigate to the App Launcher (the nine dots in the upper left). Type in Handwrytten -> Open the Handwrytten app.
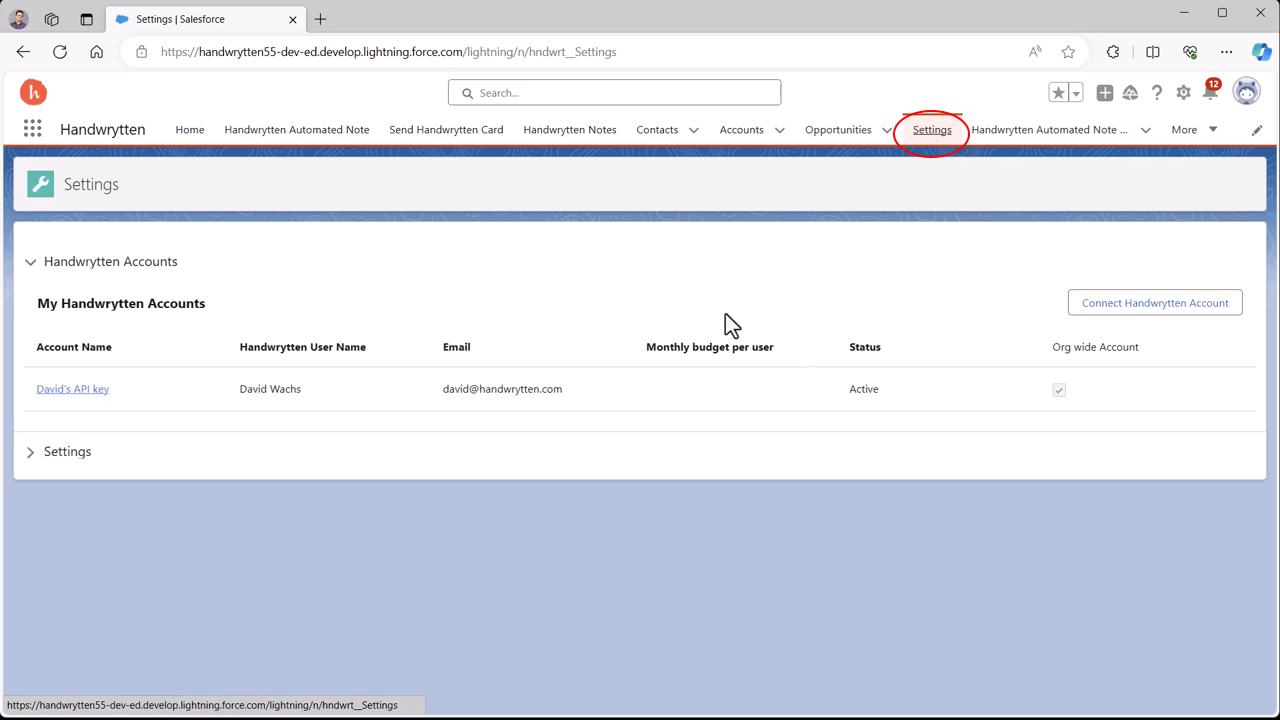
Click on Settings.
If you don’t already have an API key, create one in your Handwrytten account. Go to Handwrytten-> Sign into your Handwritten account -> Click on your profile name -> Choose Integrations.
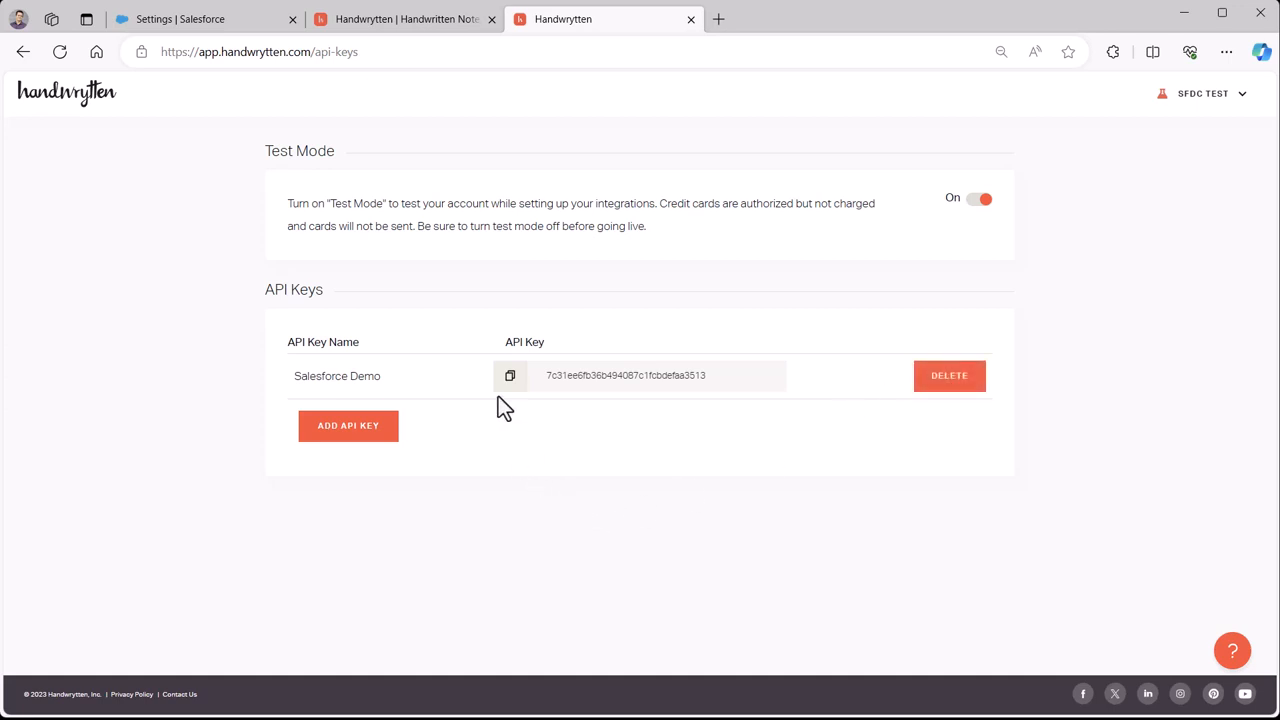
While you’re on the integrations page, ensure that Test Mode is turned on. This allows you to test all the Handwritten plugin features without being charged.
To create a new API key, click the Add API Key button and give it a name. Remember not to delete this key; if you delete it, it will disconnect Salesforce from Handwritten. Once you have created your API key, copy it by clicking the little button next to your new API key, and you’re ready to integrate.
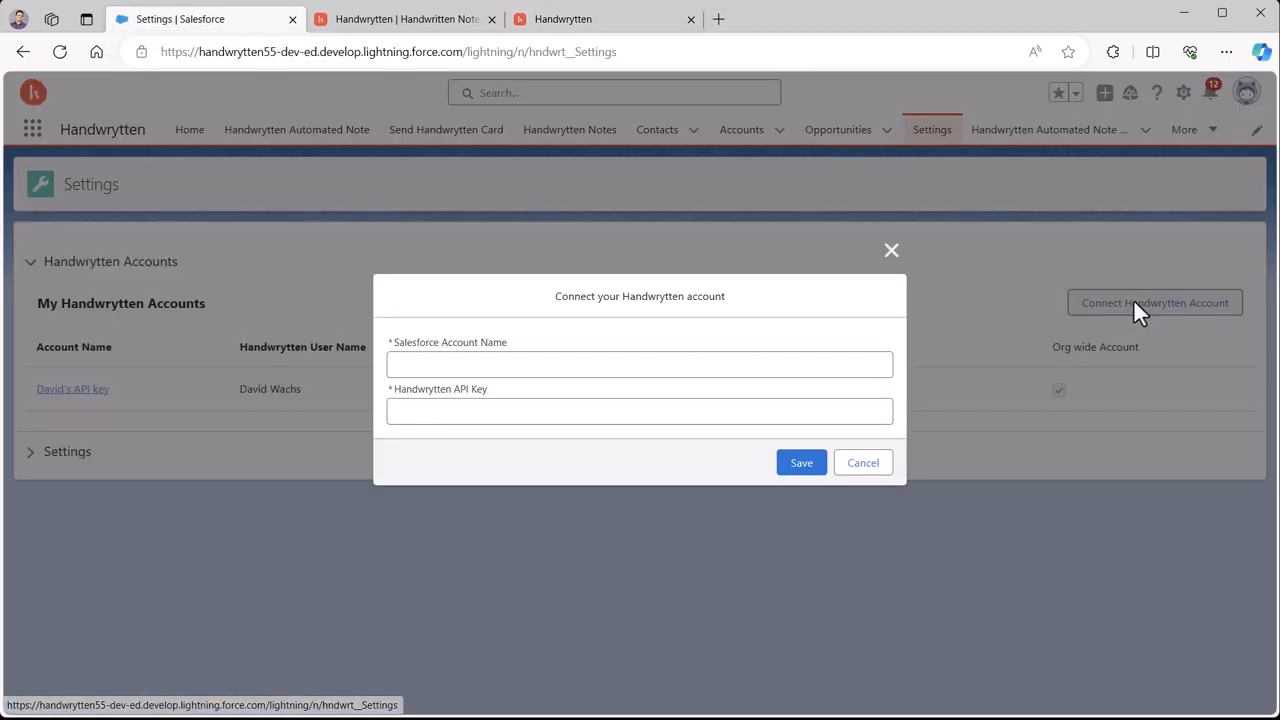
Now, go back to Salesforce and Click on Connect Handwrytten account. Type in a name to identify the account, then paste the API key you copied earlier, and your Handwritten account will be connected successfully.
Once your account is connected, check your account settings by clicking on your account name and navigating to ‘Account Settings‘.
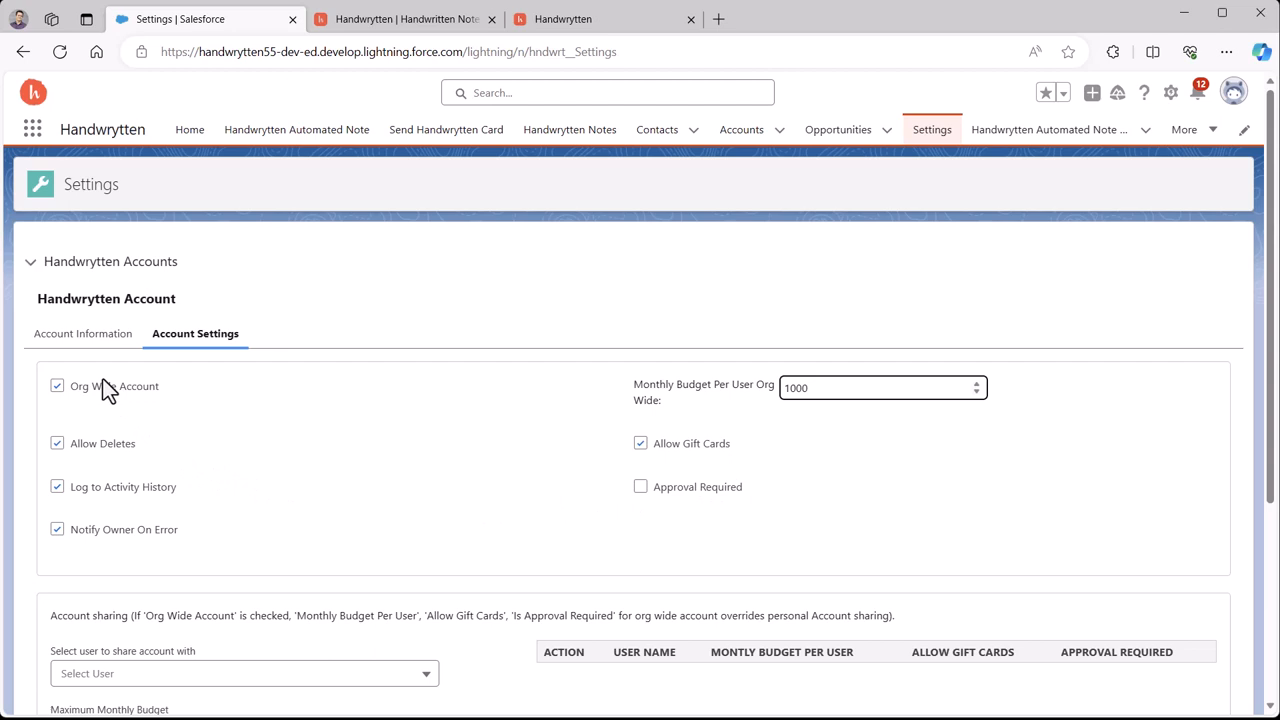
There are several features and permissions that you can adjust according to your organizational needs:
If you want to offer individual access rather than Org-wide access, you can select a particular user, set the permissions, and limit per month.
You can then hit save, and your settings will be saved.
In Salesforce, you can have multiple addresses per account, contact and opportunity. We allow you to select which one serves as the default address used for each.
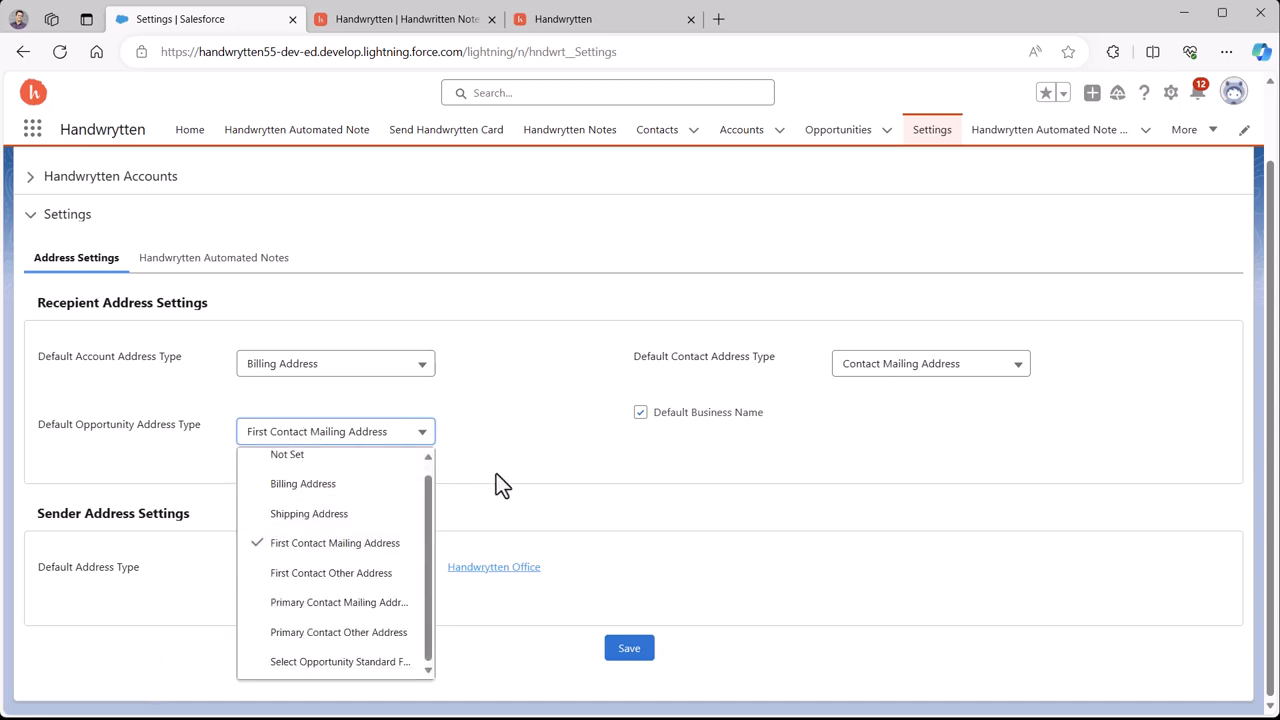
In Handwritten, you can configure your return addresses into the platform, with several options:
After this is set, you’re all done with the setup process!
Now that you have fully installed and configured the add-in, you are ready to start using sending single notes or bulk campaigns.
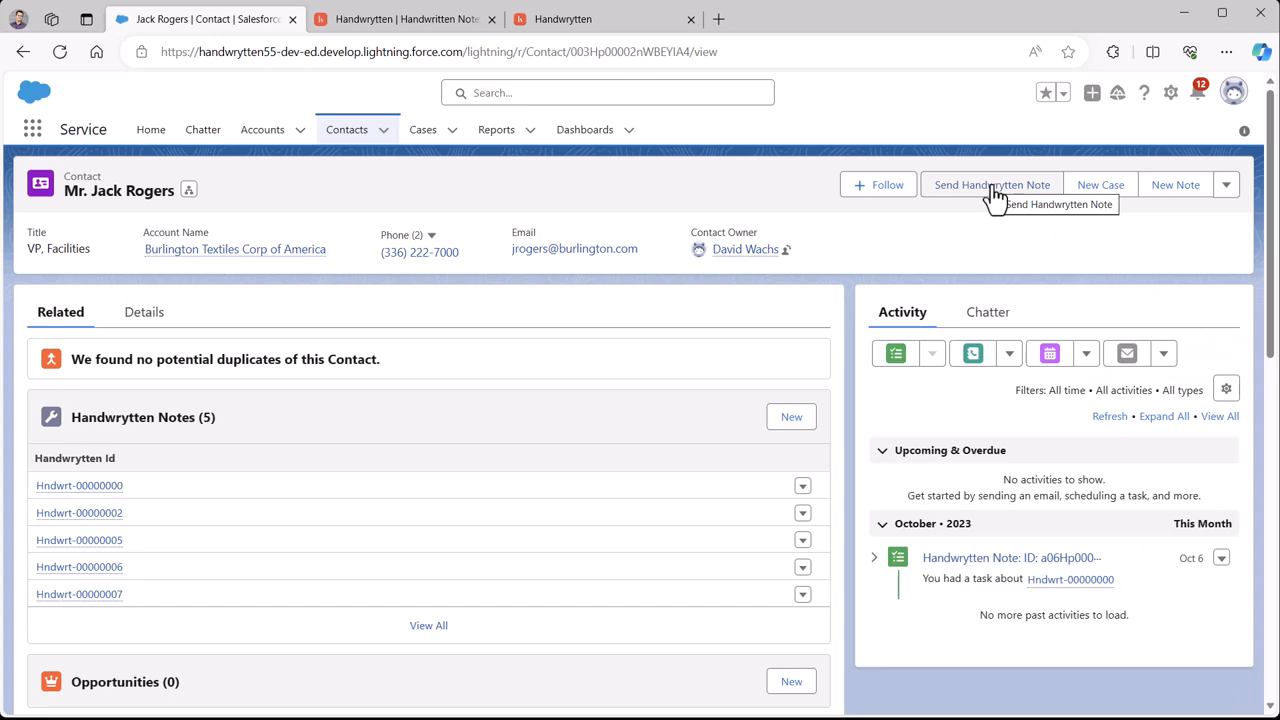
To send a note to an individual Contact, navigate through Salesforce to Contacts -> Select a Contact -> Click on Send Handwrytten Note (at the top).
Choose your card and your handwriting style, type out your message, opt for a gift card if you want, and hit Save. After this, review your card and then choose Process Order. Your note is now on its way to your recipient. (It is critical you click Process Order)
For bulk notes, navigate to Contacts. Select your desired contacts -> Click on Send Bulk Handwrytten Notes. It will then ask you to select the recipient’s address type. Validate the addresses. As long as the addresses are valid, it will let you continue to the next step. The rest of the steps are identical to sending an individual note, however please be sure to use Salesforce merge fields for the recipient’s name and company.
You should now be able to use all of the core features of Handwrytten’s plugin for Salesforce.
Should you encounter issues or need further assistance, contact us at contact@handwrytten.com. We’d love to help.

Scale your handwritten outreach, creating positive impressions and long lasting bond.
Sign Up Today!


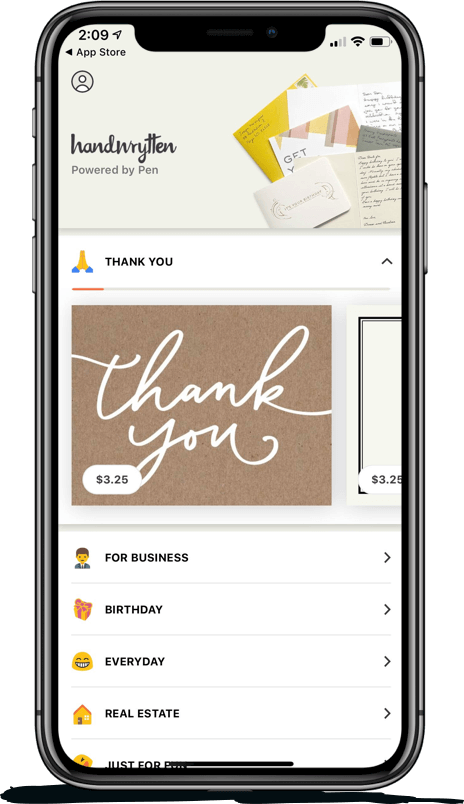
Over 100 designs to choose from or design your own. Our online card customizer makes it simple.
Check Out Our Cards!


Thank you.
